


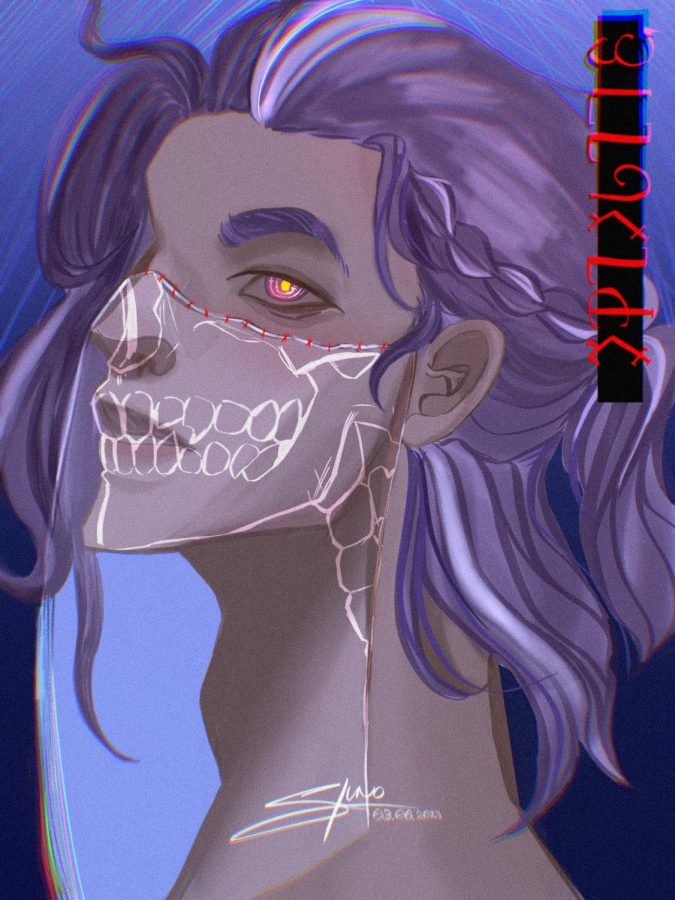
“Harvest” – Speedpaint
final
March 16, 2023
Hello there!
I am Suno “Sun” Le, and I’m here to bring my artistic abilities to this crew. For my first act, I will be showing you a speed painting of my character, Harvester, who will be appearing in another project that may appear on this site soon. If you want to skip to the speedpaint, look below, if you want to read about my artistic process, scroll down.
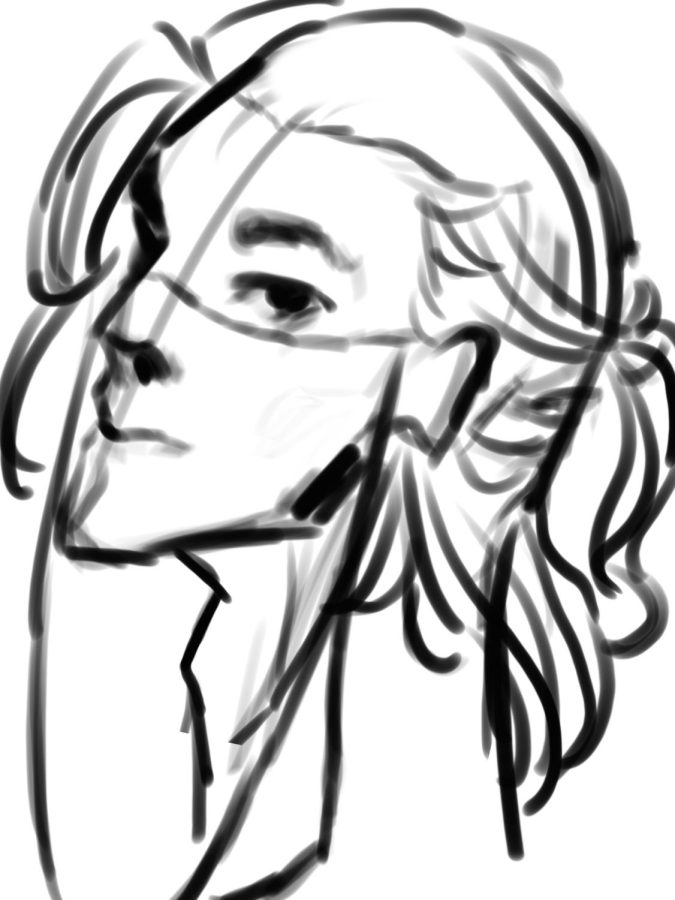
So for starters, I use a cool thing called greyscale and glazing. The purpose of greyscaling, after finishing the line art, is to make sure that the values/shades and stuff are perfectly in place. The grayscale will never always be perfect from the very beginning so I would constantly go back to edit the values to make sure the shadows look nice. However, after you finish the greyscale process, you can get to the fun bit which is called “glazing”.
Glazing is the process of switching from your greyscaled drawing to a coloured one. In most drawing software (for this piece I used Procreate), there will be a layer setting called “Colour” which you will be able to use to plot colours around your piece. The way it works is that it will automatically take the value of your greyscale below and change the shade of your colours.
After the glazing process, I would go into rendering, fixing anatomical mistakes, colouring the eyebrows (which I forgot about for like 30 minutes) and adding details. A good tip for rendering is to keep in mind what textures are involved in the drawing. Hair, for example, is silkier and thread-like, whereas skin is more matte. In this piece, I wanted to experiment with different ways to render the skull on his veil, and after many MANY attempts, I just went for the easiest solution. For all my digital artists, I just used an Overlay layer with white to outline the skull, then I tuned down the opacity to how I liked it (around 45 – 50%).
Afterwards, I would polish it and go into applying filters. The polishing phase is the phase where you can nitpick the most out of everything. This phase will abuse the use of the colour-picking tool so then you can paint over some spots that don’t seem all too great. If you see some parts in the speedpaint in which it seems like nothing is happening, SOMETHING IS! it’s just that maybe I focus too much on the finer details.
And now is the final part, filters. Yup, that’s right, even drawings use filters to make them look better. For this drawing, I only used two filters which are called “Chromatic Aberration” (the VHS effect on the edges) and “Noise” (the grainy texture on the entire drawing). Oh, and I also used a “Colour Dodge” layer to add the blue tint you see on the final render.
{ Feel free to ask questions in the comments! }